Tuesday, December 13, 2016

V8993

I started this dress waaaaay back in 2014, intending to make it for the Outfit-Along hosted by Andi Satterlund and Lauren Taylor. It was a nice idea and really fun to plan, but it was clearly not meant to be a quick project. I walked away from it a few times between each of three bodice muslins out of frustration and/or to work on more seasonally appropriate projects. I ended up finishing it in the wrong season, but I just had to wear it one time anyway.


Here are the particulars:

Pattern: V8993, length A
Size: 16
Fabric: European 100% linen, beets purple, medium weight
Lining: viscose batiste 100% rayon, salmon
Thread: Coats & Clark 9367, Mexicana, aka The Most Fun Thread Ever
Alterations:

  • 3/4" FBA
  • dropped waist 1"
  • made waist circumference 38"
  • deepened back neckline 1"
  • deepened front neckline 3/4" at top of v
  • deepened front neckline curve 1/2"
  • took 3/4" off top of front and back shoulders
  • raised armscye 1 1/2"
  • pinched a little here and a little there (and didn't document changes well)

Pattern Notes:

  • This is a Very Easy Vogue pattern, but I didn't have an easy time fitting it at all. I think the shape of the front neckline makes it more difficult to fit.
  • I remember having trouble with the understitching (step 10), but now that I'm looking at the directions again, I'm not sure why I had trouble.

The linen dulled my rotary cutter almost instantly. It was really impressive. It was also murder on sewing needles. I changed my needle once in the middle of the project, but the new one dulled so quickly that it didn't seem worth it to change again. Occasionally the needle (yes, even a new needle) would pull one of the cross-grain fibers creating tension in the fabric, rather than punching between the fibers. It was weird, but I was able to smooth out the spots where this happened.


This was my first non-invisible zipper. It's a bit ripply...better luck next time. It's pretty even at the waist and terribly uneven at the top. I don't know how I always manage that.


I love love love the color combination on the inside of this garment!


The hook and eye got caught on my hair the whole time I wore the dress.


I sewed the lining a little bit too close to the teeth of the zipper, and it's sometimes challenging to get the zipper up and down. I might unpick that and restitch it at some point.


I zigzagged the raw edges, but the linen is fraying quite a bit.  I probably should have bias bound the seams.


The pleats line up pretty well with the princess seams.


I love the crazy thread colors that are visible in the hem. I can't wait until I can finish the sweater that I originally planned to go with this dress!


After three muslins, I still ended up with too much wearing ease in this dress. I would like it to be a little bit more fitted in the waist, although I must admit the ease makes it extremely comfortable. There is way too much ease in the upper bust/shoulder area despite my alterations. You can really see it in the armscye. I think I'm starting to realize that this is a common fitting issue that I have, and reading about narrow shoulder adjustments might be helpful for me. I also wish I had deepened the neckline even more.


I'm really glad I got to wear this once before I put it in the closet until the next bare legs season. I wore it with a RTW cream cardigan to give a presentation for the FSU Coastal & Marine Lab's Board of Trustees meeting. I felt great in it. It was soooooooo wrinkly by the time I got home. I hope it still looked nice through the presentation, though.


Thursday, December 1, 2016

Colette Seamwork Akita

I started this garment in April, the night before flying home to Pennsylvania for my SIL's bridal shower, hoping to wear to the shower. As you would expect from such a last-minute plan, I messed it up and didn't finish it for several more months.

Colette Seamwork Akita

I don't think I would have chosen to make Akita if not for my last minute, late-night attempt to wear something new to a bridal shower. I was a bit nervous about the shape on my curves. I think it works, but I did delete quite a few photos from awful angles. The pattern is just one weird long piece. That was kind of cool, but also kind of challenging to cut out on my little table.


It has taken me so long to photograph this because the super light-weight cotton voile is always, always wrinkled. I pressed it this morning intending to take some quick photos before leaving the house, but I was running late. I ended up photographing it after a day of wear. It's wrinkled, but let's be honest. That's just more true to life.

Colette Seamwork Akita
Wrinkles = real life. Talking to Lilly = real life.
I took in 1/2" at the bust and tapered down to 1" at the hips. This information is of limited use because I do not remember what size I cut, and have no record of it anywhere.

I had a really hard time applying the bias tape. I seem to have trouble catching the inside of it when I topstitch. My make-it-work solution was to add a few more parallel lines of topstitching. It helped a little bit, but I still have to press the arm and neck openings before each wear. I think the parallel topstitching adds a fun touch, though.

The fabric is Dahlia in Earth by Valori Wells. I purchased it from Hawthorne Threads, but it appears to not be available there anymore.

I've enjoyed wearing this blouse. It's so light and breezy. However, that light breeziness can cause some super unflattering tenting over the belly region. I think if I make Akita again, I will try a fabric with a heavier drape.

My First Sweater!

On Sunday, I completed my very first sweater, the Enrobed Wrap from Amy Herzog's Knit to Flatter.

It took me three years on and off, so this sucker is basically an heirloom now. 


The yarn is Shepherd's Wool worsted from Stonehenge Fiber Mill in the Autumn Gold colorway. I fell in love with this yarn when I was knitting a hat for my brother. In addition to the gold, it has cream, orange and brown flecks in it. Holding it in my hands made me happy, so I bought a whole ton more of it to make a sweater for myself.


Stitching the grosgrain ribbon to the ties took two episodes of The Walking Dead, two episodes of Talking Dead, and four episodes of Parks and Recreation. I am kind of tired of handstitching for now.


I added short rows to make horizontal darts to accommodate my bust. I typed my notes into Ravelry here, but I no longer remember what they mean. Hopefully I can figure them out again next time I need to make this alteration to a sweater. Hey, I figured it out once, so I can figure it out again. Right?


If I were to make this again, which is highly unlikely as I'm pretty ready to switch to different patterns, I would drop the natural waist an inch, maybe an inch and a half. I think it would be a little more flattering to have the ties wrap around me a little lower. It looks and feels like I need to narrow the shoulders, too. The sleeve caps came out a little bit ripply. I'm hoping that will relax over time, or that I'll get better at seaming the sleeves with each sweater I knit.


All and all, I am so happy to be finally wearing this sweater and moving on with my knitting life. (Truthfully, I wore it several times before it was really finished...before the ribbons were stitched to the ties and before the ends were woven in. I couldn't wait!)


Saturday, July 23, 2016

Seafoam Moneta

I just turned another UFO into a WIP into a FO. It feels good to do that. I need to work some of that magic on my dissertation.


I started this dress last summer and finished it two nights ago. I don't really remember much of the planning, which is what tends to happen when you have super long-term WIPs like I do. If I don't finish a garment before the wearing season ends, into the fabric cabinet it goes. What's the point of finishing it if I can't wear it right away?


The pattern is Moneta by Colette Patterns. I purchased it in a bundle with Mabel and The Colette Guide to Sewing Knits when they were first released, but I wasn't really convinced that Moneta would be a good pattern for me. I thought the shirred skirt might draw attention to my waist, a part of my body I'd like to minimize, and I wasn't that excited by the shallow neckline. I'm glad I gave it a try though, because I am very happy with the results!


I am pretty sure I've never looked like I have an hourglass figure before Moneta. Thanks, Moneta! That's fun and different for me.

I cut a large and only made one alteration, my usual 2" sway back adjustment. It’s strange that I didn’t do a cheater FBA for this dress. I can’t remember why I made that decision. If I were to start over, I’d cut a medium above the bust, cheat to a large or maybe between large and XL at the bust line, and to a large throughout the rest of the bodice.

Drama.

The main fabric is cotton/lycra stretch jersey and the lining is a mystery knit from my stash. I may or may not have done a burn test before I cut it, but I don't remember the results. It's very light and stretchy, completely different from the stable seafoam knit, so I'm glad they worked well together.


The waistline is decorated with with triangle mother-of-pearl beads that I bought at New Smyrna Beads Etc. while on a short vacation with my mom in New Smyrna Beach, FL. I selected these and a few other strings of natural beads with the intention of sewing them onto garments, but without designs yet in mind. I couldn't be happier with the result!


The drag lines across the bust suggest that I need a little bit more ease there, but it was totally comfortable to wear. The upper bust is a little too big and has some gaping at the armscye, which I noticed during wear. I will try to fix that next time I sew this pattern.

This is the shot I took for instagram, and it's my favorite. I never thought I would say that about a mirror selfie.

The drag lines across the lower back also suggest that I need more ease, but again, it was very comfortable to wear. It also looks like I need to shorten the back bodice.


I often find that I can look in the mirror and be very happy with the fit of a garment, and then look at my photographs and suddenly think everything is terrible. Maybe the photos are more honest than the mirror. Or maybe my self-critical eye goes into overdrive when looking at photos. I'm trying to get better assessments of the fit of my garments AND quiet my self-criticism but putting some effort into taking better photos. This was my first session with a remote. It's a new learning curve for sure! The light in my apartment isn't great, but I'm not ready to take this show out into the yard yet.


I love when Lilly joins me in the photos.

I leave you with an awkward series in which I attempt to get photos of myself twirling. LOL.


Saturday, June 4, 2016

Sewaholic Fraser Sweatshirt

While I'm sitting in the lab on this Saturday evening, watching a screen to make sure my analysis continues to run correctly, I thought I would take a few minutes to post about one of my finished garments.

I made a Sewaholic Fraser sweatshirt for my sister-in-law-to-be (in 2 more weeks!!!) and sent it to her as a very belated birthday gift.


I made view A and cut a size small with no alterations. I haven't seen the garment on her body yet, but my sister-in-law said it fits well.

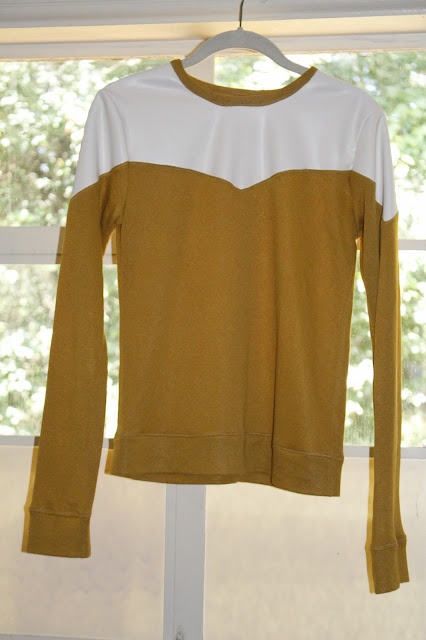
The main fabric is mustard french terry from Hell Gate Fabrics. I love the drape, color and feel of it. I have a little bit of yardage left, but I may have to order a bit more to make something for myself. I wish I could afford to buy fabric right now; I would go on a shopping spree in Hell Gate Fabrics' online store. I'm glad I found the perfect fabric for this project there and I hope to shop there more in the future. If you want to learn about Sonja's mission to source more ethical fabrics for home sewers, you should listen to this episode of Thread Cult!


The yoke and sleeve patches are made from ivory stretch faux leather from Mood Fabrics. It's sold out now, but you can still view it on Mood's website.


This was my first Sewaholic Pattern (though I have several waiting their turn in my stash). It was a great pattern to make and the directions were really easy to follow. I look forward to making this for myself someday. I'll be curious to see how their sizing works for me.

I'm so happy with how this came out, and I really enjoyed the whole process of making it...even though I had some mishaps with the vinyl that had to be ripped out and started over again (thus, the belatedness of the gift).

Monday, May 23, 2016

Fitting M7154

I'm finally sewing again after not really having much time to during the "regular academic year." Several of my projects have been gifts and that's why I haven't written them up yet (or at all, in one case).

I finished the bodice muslin for my bridesmaid dress for my brother and sister-in-law-to-be's June 18th wedding (yes, I'm feeling the time pressure a little bit).

I'm sewing McCall's 7154.

https://mccallpattern.mccall.com/m7154
I had a bit of trouble following the directions, and sewed a few parts incorrectly several times before getting it right, so I think I will try to take detailed photos and notes during construction of the actual dress.

I sewed a size 14, and it was so small that I had to cut seams open to even try it on! I'm not sure if I gained weight since I traced the pattern (months ago) or if I just made a bad call when choosing the size. Perhaps a bit of both. Here's the thing, though...in order to size up, I need a different version of the pattern! Rats!

I spent a little time tonight reading about pattern grading, but I think this is too complicated a pattern for my first attempt. I'll be heading to JoAnn Fabrics as soon as I get paid on Thursday. Hopefully they have the pattern there. If not, I'll have to mail-order it.

Silver lining: I guess I get to work on fitting some other WIPs over the next few days. I have a lot of WIPs.

So, I suppose I don't need the A5 size range (6-8-10-12-14) of McCall's 7154 anymore. I hardly ever get comments on my blog, but if you happen to see this post and want my pattern, leave me a comment with some encouragement and/or what you would use the pattern for. If I get more than one comment, I'll select a winner randomly.

Beulah Birtley made an awesome top out of this pattern. What a genius idea! I'll be doing that in the future (waaaaay post-bridesmaid dress). I think it would be fun to hack it into a cocktail length dress, too.


Sunday, December 13, 2015

Summer Sewing 2015

Summer is long gone.

I really like sharing my sewing projects.

I really hate playing catch-up.

In other words, this will be brief.

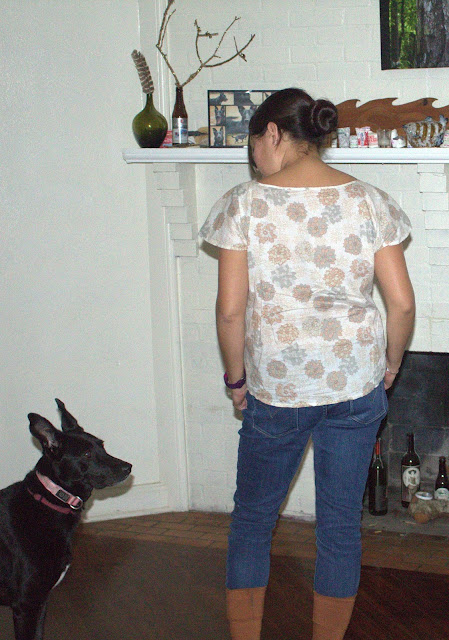
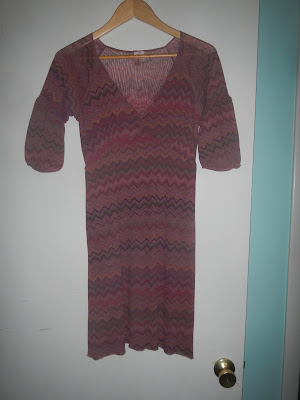
I used to love this dress, but I mended it quite a few times over the years and it started to feel old and tired, and I didn't really feel good in it anymore. I think I actually had it in my closet for several years without wearing it.
It's made of two layers of sheer nylon mesh. The prints are not matched and so they interrupt each other in such a way that the dress isn't supposed to be see-through. It kinda works.

I actually have two dresses made by this company. I bought them on the same day, spent too much money on them, and loved them well. I'll eventually refashion the other one, but the material was so difficult to sew that I need a nice long break. I used satin ribbon to stabilize my seams, which worked, but the end result looks pretty tortured.

The fabric falls off my shoulders easily and exposes my bra straps, so I wear a strapless bra and color coordinated bandeau underneath. This top is quite imperfect but overall I like it and I'm glad I turned my old dress into something I actually want to wear. The skirt is one of two Colette Mabel skirts that I made this summer. It really is as easy as everyone says. I raised the hemline two inches for this version.

Thanks to my friend Jess for the photos and helping me be silly. I'm still really uncomfortable posing for photos.


I can't find a photo of my other Colette Mabel skirt, so it'll probably show up here during Me Made May. 

I also made my third Lady Skater dress. That's right, I have made three Lady Skater dresses, love them all, and haven't photographed a single one. I'm sure I'll be making more, so I'll try to report those then.

Per usual, I did some rather boring mending and started some projects that I never finished. I plan on finishing them eventually, but they will sit until spring. What fun is it to make something I can't wear for another four months?